Each morning when we wake up we choose to either put on a bib, or an apron. This signifies our choice to serve (apron), or to be served (bib). Too often we look to other people to fulfill our needs. Instead, we need to tie up our metaphorical apron strings and get down to serving. Christ came to serve, not to be served. If we follow in His footsteps, we must become a servant of His first, and then we will become a servant for others. Elegance in your home will do you no good, if it's not shared with others. There is nothing more elegant than a hospitable home and a servant's heart. Let's open up our homes and share our blessings with others.
In honor of this post, I have included instructions on how to make a simple, but super cute apron from a pillowcase. I found this idea on a website, so if my pictures are not clear to you, then you can always google "pillowcase apron" and hopefully you'll find instructions to help clarify.
I have described each step as well as taken pictures so that you will be able to duplicate this project if you so desire. There are very few items that you need to make this...
1. An old pillowcase (that's cheap right?) Grab one out of your nicely organized linen closet, or go to the nearest thrift store and find one with a cute print.
2. Some coordinating ribbon
3. Thread
4. A sewing machine
5. Some straight pins
6. And about 20 minutes, or if you sew like me, about half a day.
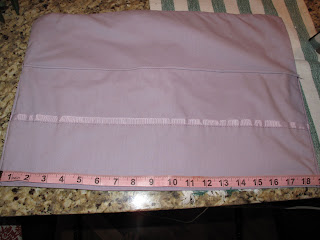
Lay your pillowcase (ironed of course) flat. Fold up the open end about 8 inches.
Iron to create a stiff crease. It makes it easier to sew.
Stitch along folded part. Does this picture make sense to you? I hope so!
Turn pillowcase over. Grab the sewn crease and pull up another 8 inches.
Iron again, then sew along new crease. Do you like my hairdo?
Just keep sewing, just keep sewing, just keep sewing.....
Sew along the sides of the 8 inch folds. This will create the edges of the pocket.
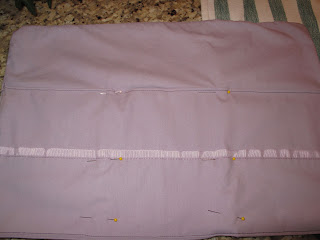
Measure along the bottom of the apron. If you want an apron with two pockets, find the center and pin. I made mine with 3 pockets, so I divided the pillowcase into thirds and pinned.
My mom helping me pin. I told you I was inept at sewing.
Apron with the pins marking where to sew the pockets.
When the pockets are sewn, take coordinating ribbon and find the center of the length of ribbon. Place on the center of the apron at the top and pin. Pin across to hold the ribbon in place to sew.
And VOILA! You have a cute, functional apron. This of course would work for cooking, but with those great deep pockets, it would also be ideal for gardening, or for teachers holding for art supplies.
This apron cost me about $5 to make. That was just for the cost of the ribbon. What a great gift idea for your mom, sisters, or girlfriends! You could make them for different holidays! I'm pretty excited about how cute they are, and frankly I'm excited that I used a sewing machine and didn't do bodily damage.
Remember to put on your apron every morning and serve your family, your coworkers, and your neighbors. That's a simple, pure way of adding elegance to your life.


Em, I love your posts. I've not missed one yet. :) Love your hair...and who all was helping you? I saw different hands in the pictures. Sewing is a lost art seems like -- its good to see a sewing post! And I needed that reminder -- APRON on today! At least I'm going to try. :)
ReplyDeleteThe first hands are mine, then it's my mom's hands pinning the apron, then it's Kerri modeling the apron. We like to keep you guessing!
ReplyDelete:)
ReplyDeleteLove this one! If it's okay with you, I'd like to take this concept to our next manager meeting. Such a great analogy!
ReplyDeleteLove it!!
ReplyDelete