What would make your holidays more jolly? How about a treat just for you? Jen and I are doing our first giveaway! Keep reading to find out more....
I did a post awhile back on family traditions, but let's talk about mainly about Christmas traditions.
As my children get older and they are able to do more, it's important to my husband and me to formulate traditions that our kids will remember for years to come. In our family we watch one Christmas movie each week, we all decorate the tree together, make ornaments, and other crafty things. Then my mom and I will make a boatload of sugar cookies and we all get together with the kids, sisters, husbands and have a cookie decorating contest. We lay them all out on my mom's kitchen island and anyone who comes over has to vote for the best cookies. My mom, and sister Molly ALWAYS win. No, I'm not bitter at all. These are not earth shattering traditions, but they are important to us.
I would love to hear what your traditions are during the holiday season. And here is where our giveaway happens!
Go to our Facebook page, "Striving for Elegance." "Like" our page if you haven't already, then post your favorite family tradition. For posting your tradition you will have you name entered ONCE into the drawing, if you also post a picture of your tradition, you will have your name entered TWICE!!! All entries must be received by Thursday, December 2oth. We will do the drawing on Friday, December 21st and announce the winners. You could win a gift card to Starbucks, or Target. So break out those cameras, and let us know what your favorite family Christmastime traditions are.
~Emily

Friday, December 14, 2012
Wednesday, December 12, 2012
Snowman Soup
Good Afternoon, Readers!
I wanted to first of all share how delighted I am that several of you have added ribbon to your christmas trees after reading my last post! I've received text messages, emails, and FB comments letting me know that you've added ribbon to your tree and are loving it! yay! It's always good to get positive feedback.
Today I want to share with you a simple idea for a stocking stuffer, child's class christmas party gift, neighbor gift, etc. The great thing about the idea I'm about to share, is that it is totally customizable and you can make as many or few as you need. Drumroll please..................................................................
SNOWMAN SOUP! Snowman soup? That's what my son said. Although he's helped me put together Snowman Soup in the past, he didn't remember it. Snowman Soup is a fancy term for hot chocolate. I got this idea originally from Christy Jordan at southernplate.com. If you haven't checked out her website, you really need to. She is as down-to-earth as one can be, and she is always sharing wonderful, economical ideas for your kitchen. I've made Snowman Soup for several years now, the kids and I just finished putting together 65 Snowman Soup kits. Ack!!! We needed little gifts for my son's class, plus 45 stocking stuffers for a christmas party with all the little kids from our congregation.
If you are looking for a cute, inexpensive little gift...look no further. You can come up with your own label or find the one Christy has provided on her website at: http://www.southernplate.com In the search engine, type "snowman soup" and you will be redirected to the post she wrote with the link to the labels. That's what I did, and I just love 'em. Here's what they say: "When it's so cold that you holler and whoop, it's time to bring out the Snowman Soup! Pour the packet in a mug. Add marshmallows, too. And throw in these kisses from the snowman to you. Now add some hot water and use the cane to stir it. Sip slowly and soon you'll feel the warm winter spirit!"

This works best if you gather up your little chicks and have them do all the work. Ha! Yes, my 5 year old and 3 year old had a blast putting these kits together. It's a little something they are big enough to do and helps teach them that gifts do not have to be name-brand, fancy, or expensive.

You will need: Hot Cocoa Packets, Candy Canes, Hershey Kisses, Marshmallows, Ziploc bags, Snowman Soup tags. Inside each ziploc bag we put: 1 hot cocoa packet, 1 candy-cane, 2 hershey kisses, and a handful of marshmallows.

After you've completed putting all of the Snowman Soup kits together, staple on a label and Voila...simple, perfect little gift. Enjoy! ~ Jennifer

Wednesday, December 5, 2012
Unique Ribbon Technique for your Christmas Tree
Hey Everybody! I hope all of you had a wonderful Thanksgiving holiday. I know our family had such a great time. I'm super thankful for all of the family that came to visit and for all the fun we had playing cards, listening to the cousins make-believe, singing, laughing, and of course...EATING! I'm really glad I had made ahead a large batch of chili and 2 lasagnas for my freezer. It was so nice to be able to just pull those out and whip up a couple things to go with them and, VOILA...two simple, delicious meals. We are going to be hosting my side of the family for Christmas, so you better believe I will be doing some freezer prep in the next week or so to get ready for that.
Today I want to share with you a super simple, yet unique way to decorate your christmas tree with ribbon. I saw this technique done on one of the trees in a fellow church member's home a few years ago, and I've been storing it away in my brain ever since. Well, this year I finally put it to use, and it couldn't be easier. Here's a picture of my finished tree. I just LOVE it.

For this simple, yet elegant project, you will need your favorite christmas ribbon and pipe cleaners (chenille stems). Oh, and don't forget the scissors. :)
I used two large rolls of ribbon, about 2 1/2 inches wide, and this did a pretty good job of covering my 9 foot christmas tree. I bought white pipe cleaners, because my tree is flocked, but you may want to use green if your tree is not flocked. This picture shows what you are going to make:
 Cut the ribbon into 12 inch strips. Holding a ribbon strip in one hand, place the pipe cleaner in the middle of the ribbon and twist to secure. Repeat process until all of your ribbon strips are secure on pipe cleaners. Strategically place on your christmas tree. Step back and marvel at the beauty! How cute and inexpensive is this? And, it has big impact. My sister-in-law was here for Thanksgiving and she LOVED this ribbon technique.

If you already have your tree decorated perfectly for this year, then just store this idea in the files of your brain for next year. Enjoy!
~Jennifer

Today I want to share with you a super simple, yet unique way to decorate your christmas tree with ribbon. I saw this technique done on one of the trees in a fellow church member's home a few years ago, and I've been storing it away in my brain ever since. Well, this year I finally put it to use, and it couldn't be easier. Here's a picture of my finished tree. I just LOVE it.

For this simple, yet elegant project, you will need your favorite christmas ribbon and pipe cleaners (chenille stems). Oh, and don't forget the scissors. :)
I used two large rolls of ribbon, about 2 1/2 inches wide, and this did a pretty good job of covering my 9 foot christmas tree. I bought white pipe cleaners, because my tree is flocked, but you may want to use green if your tree is not flocked. This picture shows what you are going to make:


If you already have your tree decorated perfectly for this year, then just store this idea in the files of your brain for next year. Enjoy!
~Jennifer

Thursday, November 29, 2012
Apple/ Pumpkin Butter
I have a wonderful idea for a holiday gift for you! It's easy, it's inexpensive, and it's delish! It's apple pumpkin butter!!!!!
Here is the simplest gift you will ever make (besides those slice and bake Pillsbury cookies).
 Here are my ingredients. The only ingredient not pictured is brown sugar. You will pour the entire applesauce container, both cans of pumpkin, 1 cup of brown sugar, 1 tsp nutmeg, and 1 Tbl cinnamon into a large pot.
 Bring to a boil, then immediately reduce to medium/ low heat. Let simmer for about 1 hour, then spoon into mason jars, and tie with a cute tag, or ribbon.
 These will stay fresh in the fridge for about 2 weeks. They make great hostess gifts, gifts for neighbors, gifts for coworkers, gifts for teachers, or they make a scrumptious snack for you! It is so good on bagels, toast, waffles, pancakes, or with a spoon straight out of the jar...shhhhhhh.......
 Add, subtract, or adjust the amounts of the cinnamon, nutmeg, and brown sugar to your taste. I was able to get 8 jars of the pumpkin butter from my recipe. Enjoy!
Here is the simplest gift you will ever make (besides those slice and bake Pillsbury cookies).


Friday, November 16, 2012
4 Helpful tips for Hostessing
Today I'm coming to you with a few tips to make your holidays less stressful and more joyful.
Like I mentioned in my previous post, I have about 5 to-do lists going right now. Thankfully, I marked off several items from the list this morning, so I'm feeling pretty good right now. Since Jamie and I have been married, we have hosted countless parties and get-togethers. I could tell some stories about "the good, the bad, and the ugly" pertaining to the parties we've hosted. I have not always been the planner that I am now, and I've definitely stressed myself out far too many times to count. I used to leave everything to be done on the actual day of the party: House cleaning, food prep, baking, cooking, etc. Now that I have 2 kids, there's no way I can get by with that kind of procrastination. So, below are a few ideas and tips for planning ahead in order to make your life just a little bit easier.
Tip #1: I've learned to plan my menu in advance, making sure that it consists of several make-ahead items that can either be frozen until the day of the party/dinner, or refrigerated in an air-tight container.
Next week we will have 13 people under our roof for Thanksgiving. My Thanksgiving menu is planned, but here's the kicker....they are going to want to eat on all the other days they're here, too! What??? So, I've been prepping and planning. I have 2 lasagnas already prepared and waiting in my freezer. I'm planning to cook a dutch oven full of chili this weekend to freeze, and I have lots of sandwich fixins in my refrigerator. I have several other meals planned that will need to be cooked the day we will eat them, but it's nice to know that I can pull out the lasagnas and chili when I'm not feeling like cooking a full meal. This past week we had vegetable soup and cornbread for dinner one night. Trying to think ahead, I made a double batch of cornbread so that I could freeze half to use in my Thanksgiving dressing next week. This weekend I'm going to go ahead and make a pecan pie to freeze. Use your freezer, people! If you don't have a second freezer, I would highly recommend purchasing one. I bought mine several years ago at a garage sale for less than $100, and it is seriously one of the best purchases I've ever made.
Tip #2: Clean your house the day BEFORE company is coming or the day BEFORE you're hosting a party. If you wake up on "game day" and your house is already clean, you will be in a much better state of mind to work on the food prep and actually ENJOY hosting people in your home. If you haven't prepared in advance, and you are running around trying to clean and cook, you will be a nutcase by the time your company arrives. Trust me, I speak from experience.
Tip #3: This may sound silly, but allow time for yourself. Plan your party outfit in advance. Allow time to enjoy getting yourself ready for your party. After-all, you are the one who opted to host a party or company in your home, you should enjoy it the MOST!
Tip #4: Relax and Have fun! Like I said in my earlier post, the holiday season is not all about making yourself look like the perfect Martha Stewart. The holiday season IS about generosity towards others, making memories with your family and friends, and enjoying each tradition, whether old or new.
My wish for each of our readers is this: May you be overwhelmed with Joy and Gratitude as you celebrate the Thanksgiving Holiday next week. No matter what your situation may be, I pray that your blessings be innumerable and your heart always humble.
~Jennifer
Wednesday, November 14, 2012
What is your Holiday plan?
"Those who fail to plan, plan to fail". As the holidays are fast approaching, we are all busy making plans. Plans for company to arrive, plans for parties to host or attend, meal plans, etc. I have at least 5 lists going right now with all my planning. I don't want to fail as a hostess, but am I setting myself up to fail in other areas? I think that we oftentimes spread ourselves too thin during this time of year. Although we may throw a fabulous christmas party or truly be the Thanksgiving "hostess with the mostess", we fail to see the "big picture". In my life, the big picture is trying to glorify God as a wife and mother. Am I going to allow all of my planning, all of my to-do lists to get in my way as a wife and mom? Am I going to allow the stresses of having a big house to keep clean, parties to host and attend, cookies to bake, gifts to buy and wrap, keep me from my real purpose? My husband and two children are far more important than what's baking in my oven or how "Martha Stewart-like" my christmas tree looks. I want to continue to succeed as a caring and nurturing wife and mother, while trying to balance the plate I've set for myself during the next few weeks. I am pledging to step back and relax, to really enjoy the magic of the holiday season thru the eyes of my children, and to worry a little less about the dust on my coffee table and my kitchen floor that needs to be mopped.
~Jennifer
And by the way, if you want to know the quickest way to have your kitchen smelling fabulous, all you need to do is dump cinnamon all over your counters and floor. Instant Success!
~Jennifer
And by the way, if you want to know the quickest way to have your kitchen smelling fabulous, all you need to do is dump cinnamon all over your counters and floor. Instant Success!
Wednesday, October 31, 2012
Short Thought for the Day
I hope so far, you have been enjoying our blog now that it's up and running again. Let us know if you've tried any of the projects so far and how well they've turned out. If they didn't turn out well, then we don't want to hear from you...kidding :)
Here's my little tidbit for the day. It's not a project or a craft, just a simple thought. I've been reading a book about reducing stress and creating a calm environment in our home. It's by Karen Ladd who has written several books helping moms have a positive attitude in the midst of day to day trials. Today, though, that idea has struck a chord with me. As I was scrolling through Facebook looking at all the adorable costumes and videos and reading about the plans for trick-or-treating I suddenly started feeling guilty. My Halloween plans (or lack thereof) for my children were not as intricate, well-planned-out, or as exciting as most other parents.
So I ask you, does that make me a bad mommy? I hope you would answer, "Certainly not!" I would love nothing more than to have craft time during the week to sew my little darlings adorable homemade costumes, or be able to do a craft each day, or carve each pumpkin into a different superhero, but the truth of the matter is, I can't. At least not right now. As the guilty feelings crept into my heart, I realized that each of us is in a different stage in life. There are mothers who have the time to sew costumes, or host Halloween parties, or take their children trick-or-treating for hours. I have to realize that having 3 children under the age of 4 prevents me from having the time to do all those creative things right now. But it is a stage and it will pass. To keep peace in my heart and in my home I can only do so much. As I've stated before in previous blog posts, elegance is an outward expression in your life that first takes root in your heart. There's nothing elegant about stretching yourself too thin, or wearing yourself out corralling 2 costumed toddlers and an infant trick-or-treating when they really don't care to go in the first place. And there is no elegance in comparison. Don't compare what you're able to do with the next mom.
So to all you mothers out there who have big Halloween plans with your kiddos, more power to ya' and I hope you guys have a BLAST!!! That might be me next year! To those mommies in the same stage of life as me, don't worry. Our time will come and right now lets enjoy the fact that our kids are sort of oblivious to the hype of Halloween. Let elegance and peace rule in your heart and set limits for yourself.
Now, where did I stash that candy corn?
Monday, October 29, 2012
Gingerbread Mummies
Happy Halloween, everyone! I'm coming to you today with a family recipe, sure to delight little goblins of all ages. My Granmomma is famous for her gingerbread cookies. Everyone who has had the pleasure of knowing her, is aware of the fact that she makes the very best gingerbread cookies on Earth. She makes them for all occasions, especially for grandchildren and great-grandchildren. I remember as a little girl, baking with my Granmomma in her kitchen. She used to have a gray stool that I would sit on, a little orange and white gingham apron I would wear (which I now have!), and a miniature rolling pin for me to use. She would make the dough, sometimes weeks in advance, and store it in the freezer so it would be ready for my siblings and me when we arrived at her home. She would often invite other children from the congregation where my Gramps was a full-time preacher over to make cookies with us. As far as I can tell, Granmomma always has a batch of gingerbread cookies just minutes away from being ready to eat. She decorates the cutest little gingerbread boys with red-hots, mini chocolate chips, or raisins for the eyes and buttons. She also pipes icing onto the cookies to decorate them and make the cookies extra special. At Christmastime, Granmomma always arrives with a cookie tin full of beautifully decorated gingerbread boys. I am so very thankful that my children have had the priviledge of making gingerbread cookies with my Granmomma (They did so just 2 weeks ago!) She goes out of her way to make the every-day, extraordinary. It would be absolutely impossible to count the number of lucky people who have eaten one of her ginger cookie boys. She is truly a blessing.


So, today I'm going to share with you her recipe. My children and I made these cookies over the weekend, but instead of making them look like gingerbread boys, we decorated them to look like Mummies. Well....I did. Parker and Natalie just decorated theirs...it won't be hard to tell which ones they belong to them. I like to call theirs "Scary-Good". Ha!
Granmomma's Ginger Cookie Boys
1 c. margarine
1 1/2 c. sugar
1 egg
4 t. grated orange peel
2 T. dark corn syrup
3 c. flour
2 t. baking soda
1 t. ginger
2 t. cinnamon
1/2 t. ground cloves
1/2 t. salt

Thoroughly cream together the margarine and sugar. Add egg; beat until light and fluffy. Add orange peel and corn syrup, mix well. Sift together dry ingredients, stir into creamed mixture. Chill dough thoroughly. (I made the dough a couple of days in advance and stored it in the refrigerator until I was ready for the kids to roll it out.)

On lightly floured surface, roll dough very thin and cut ginger boys. Use raisin pieces or red hots for face and buttons.


Bake at 375 degrees on ungreased pan, for 8-10 minutes. Cool 1 minute before removing from pan. Decorate further if desired using cake decorating tips. (After the cookies were finished baking, I stored them in a plastic, air-tight container until the next morning when we were ready to decorate the cookies.)
Icing for Cookies
1 3/4 c. powdered sugar
1 1/2 t. meringue powder
2 T. water
1 T crisco
1 t. vanilla
Combine all ingredients until smooth. Fill piping bags and decorate. Or, fill a ziploc bag and snip off one of the corners, to make your own piping bag.


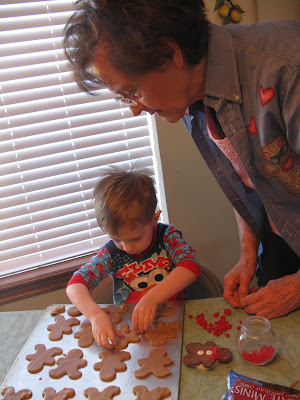
This is my Granmomma, giving Parker his very first taste of a ginger cookie boy! Was he really, ever that little?

Parker (2 yrs. old) decorating cookies with Granmomma.

Last Christmas, Granmomma brought large ginger cookie boys for Parker, Natalie, and Cousin Hannah to decorate. They loved it!
So, today I'm going to share with you her recipe. My children and I made these cookies over the weekend, but instead of making them look like gingerbread boys, we decorated them to look like Mummies. Well....I did. Parker and Natalie just decorated theirs...it won't be hard to tell which ones they belong to them. I like to call theirs "Scary-Good". Ha!
Granmomma's Ginger Cookie Boys
1 c. margarine
1 1/2 c. sugar
1 egg
4 t. grated orange peel
2 T. dark corn syrup
3 c. flour
2 t. baking soda
1 t. ginger
2 t. cinnamon
1/2 t. ground cloves
1/2 t. salt

My kiddos LOVE to unwrap the butter and throw it in the mixing bowl. :)

On lightly floured surface, roll dough very thin and cut ginger boys. Use raisin pieces or red hots for face and buttons.


Bake at 375 degrees on ungreased pan, for 8-10 minutes. Cool 1 minute before removing from pan. Decorate further if desired using cake decorating tips. (After the cookies were finished baking, I stored them in a plastic, air-tight container until the next morning when we were ready to decorate the cookies.)
Icing for Cookies
1 3/4 c. powdered sugar
1 1/2 t. meringue powder
2 T. water
1 T crisco
1 t. vanilla
Combine all ingredients until smooth. Fill piping bags and decorate. Or, fill a ziploc bag and snip off one of the corners, to make your own piping bag.

This was Parker and Natalie's first time to use a piping bag. The loved it. I totally let them decorate the cookies however they wanted to. No need to stress over what the cookies looked like...they were supposed to be SCARY! :) Making memories is not about perfection.

Scary-good.

My Mummies.
So, go grab your goblins and bake up a good time. This recipe is sure to please. Enjoy!
~Jennifer
Wednesday, October 24, 2012
Fall Burlap Garland
Usually as soon as the first leaves start falling off the tree I'm begging my husband to get my fall decorations out of storage. This year, however, I'm just not feeling the fall vibe. Perhaps it's because it's October 24th and still 70 degrees outside, or perhaps it's that I now have 3 children and decorating and undecorating (is that a word?) for seasons seems overwhelming, or perhaps it just that I'm saving up to go all out for Christmas. Plus, here's the biggest shocker, I've only had 1 pumpkin spice latte so far this season. What's wrong with me???????
I've kept my fall decor to a minimum this year, and I wanted to share with you one of my simple projects. It's a fall garland made from burlap and felt leaves. I did it one night after the kids were in bed and it took maybe about an hour. My kind of project these days :)
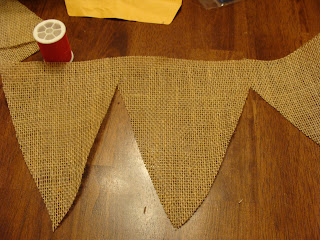 I had leftover burlap from another project, so I cut out "V" shapes so it formed a pennant banner look.
 Here is another look at it.

I used stencils and a sharpie, but if you have good penmanship you could totally freehand it.

Then for the leaf garland I cut out leaves from felt and sewed them together.
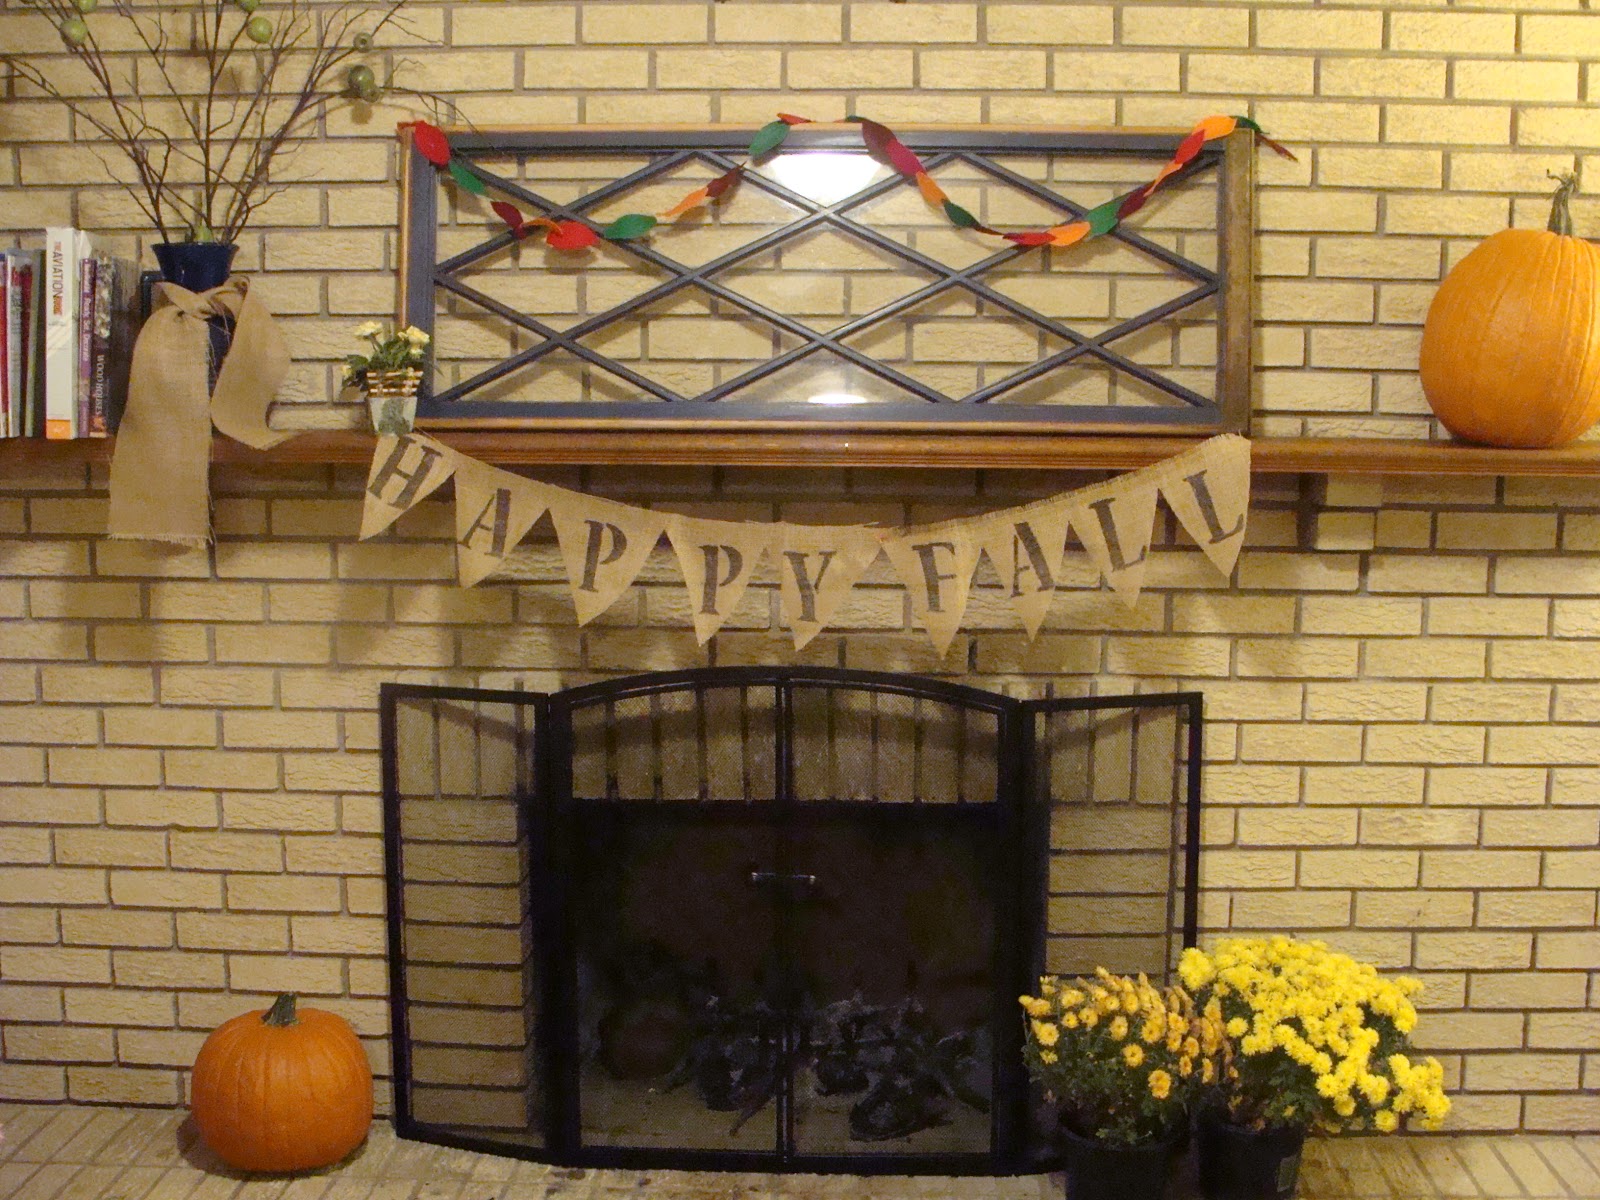
 Here is the finished product on my mantle.
 I was playing with the placement of the garland to see where it looked best. The total cost for this project was probably about $2.50. I already had the stencils from another project I had done. Burlap and felt is so inexpensive!
You could change it up and do one for christmas and sew little red and green pom pom balls on it, or really any season or occasion. Be creative!
Hmmmmmmm......I think I need a pumpkin spice latte.
I've kept my fall decor to a minimum this year, and I wanted to share with you one of my simple projects. It's a fall garland made from burlap and felt leaves. I did it one night after the kids were in bed and it took maybe about an hour. My kind of project these days :)


I used stencils and a sharpie, but if you have good penmanship you could totally freehand it.

Then for the leaf garland I cut out leaves from felt and sewed them together.

You could change it up and do one for christmas and sew little red and green pom pom balls on it, or really any season or occasion. Be creative!
Hmmmmmmm......I think I need a pumpkin spice latte.
Monday, October 15, 2012
Caramel Apples
Welcome to "Striving for Elegance". We are so glad you joined us here today. Emily and I are very excited to be starting up this blog again with what we hope will be inspiring seasonal ideas for you and your family.
I plan to tell you a little more about how Emily and I came to be such good friends in a later post, but for today we are going to be getting our hands sticky with.....CARAMEL APPLES!
When it comes to the changing seasons and the thought of approaching holidays, my mind is always geared towards traditions. As the momma of two precious kiddos, I work hard at helping them make memories that I hope they will cherish for years to come. Many of the memories I hold dear from my childhood have to do with food. Yes, I love to eat, but I really love "special" food, the food that only gets baked/cooked when it's snowing outside or Granmomma is in town, or company is coming for dinner. To me, caramel apples are one of those "special foods" made for October, to be shared with your children, neighbors, family, etc. I remember as a child, unwrapping little bit-sized Brach's caramels, for my mom to melt. However, a few years ago I decided I wanted to make my own caramel, and found this recipe that has turned out yummy and perfect caramel apples for several years in a row. I even got crazy one year and made 4 batches in one night. This recipe produces delicious, golden brown, aromatic caramel that will have you licking your fingers in no time (please let it cool first).
Here's the recipe:
1 cup (2 sticks) unsalted butter
2 cups brown sugar, packed
1 cup light corn syrup
1 14oz. can sweetened condensed milk
2 1/2 tsp. vanilla extract
12-15 small Granny Smith apples
popsicle sticks, or lollipop sticks
Begin by washing your apples, inserting the sticks, and placing them on a wax-paper lined cookie sheet . Spray the wax paper with non-stick cooking spray and refrigerate your apples for at least an hour. It is best to dip cold apples in warm caramel, so that the caramel doesn't fall completely off of the apple.

When you are ready to begin making the caramel, combine the butter, sugar, corn syrup, and condensed milk in a dutch oven or heavy sauce pan over medium-high heat.
Bring to a boil.
Allow the mixture to boil for approximately 20 minutes, or until it reaches 245 degrees on a candy thermometer. You really need to use your best judgement when making caramel, as it may not need to boil 20 minutes before it is ready. Use your nose...if you begin to smell ANY hint of burning, turn the stove off immediately and remove the pot from the heat. Your caramel is ready. Preferably, you would remove the caramel from the heat before any caramel has a chance to burn. Once you remove the mixture from the heat, stir in the vanilla. Now, you are ready to dip your apples!
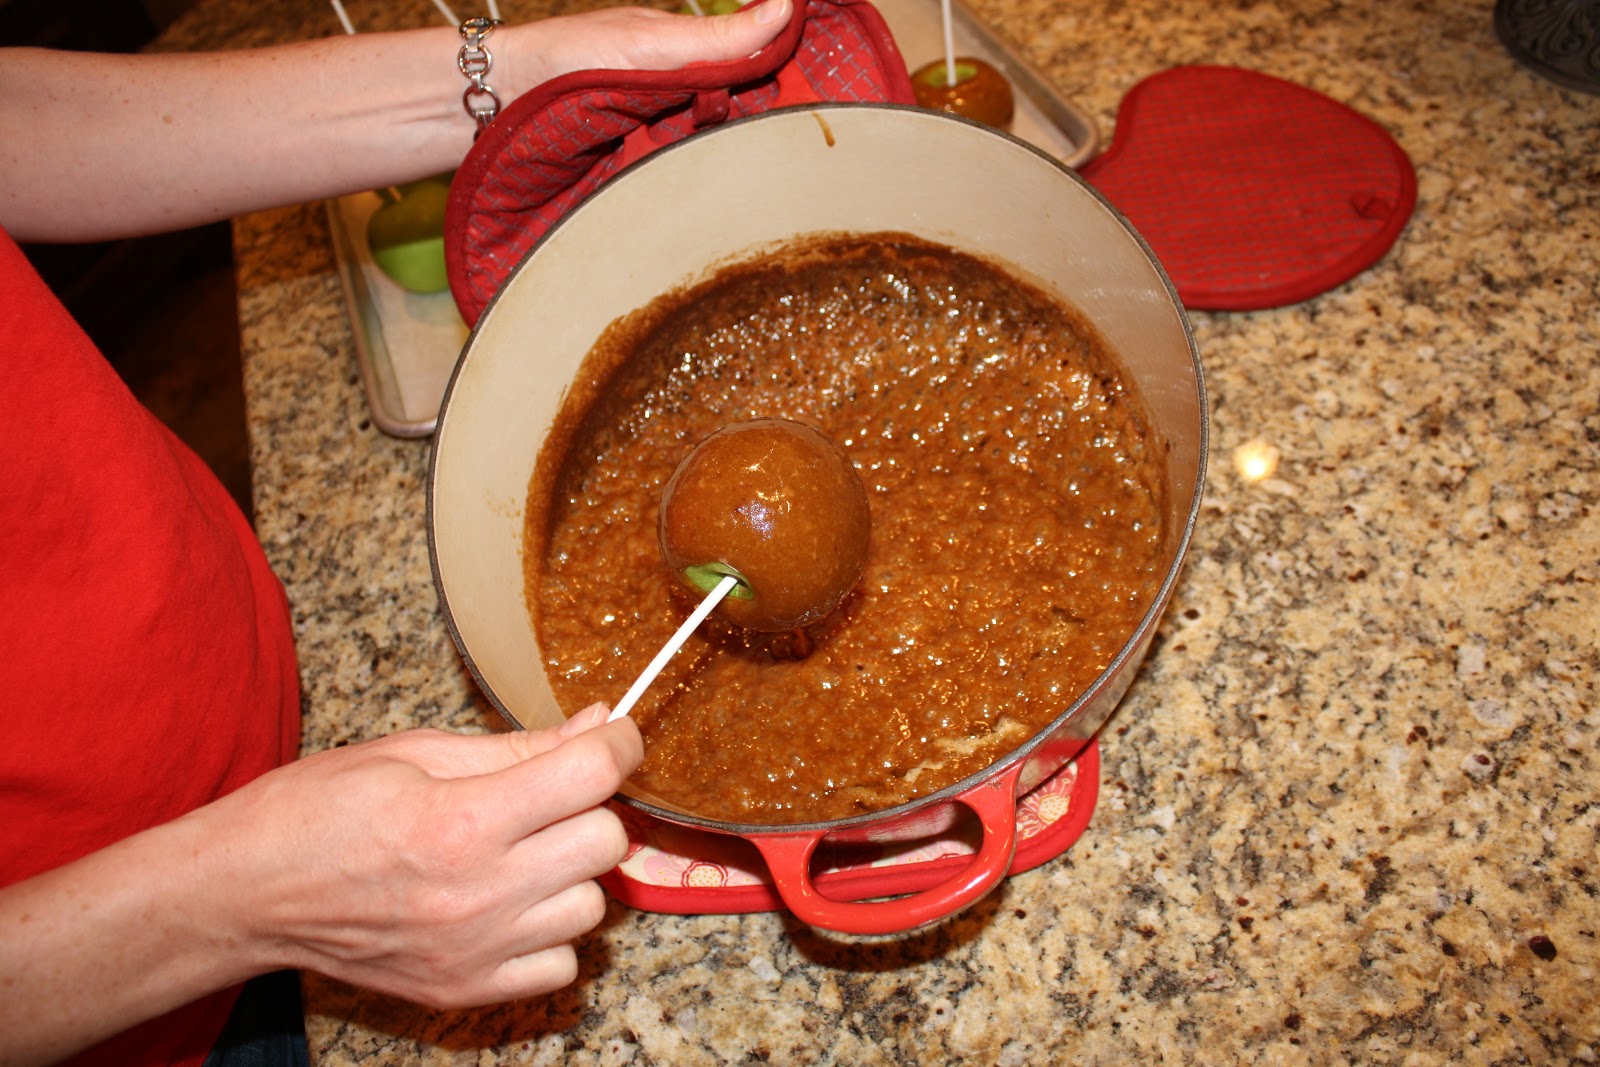
One by one, dip the apples at an angle into the caramel, rotating them until they are completely covered in the delicious, sugary goodness.

After you have dipped all of the apples, allow them to cool completely.
If you have extra caramel, you could dip a spoon in it, let it cool, and feed it to your hungry children...or you could eat several bites of caramel yourself when no one is looking. I wouldn't know anything about that.

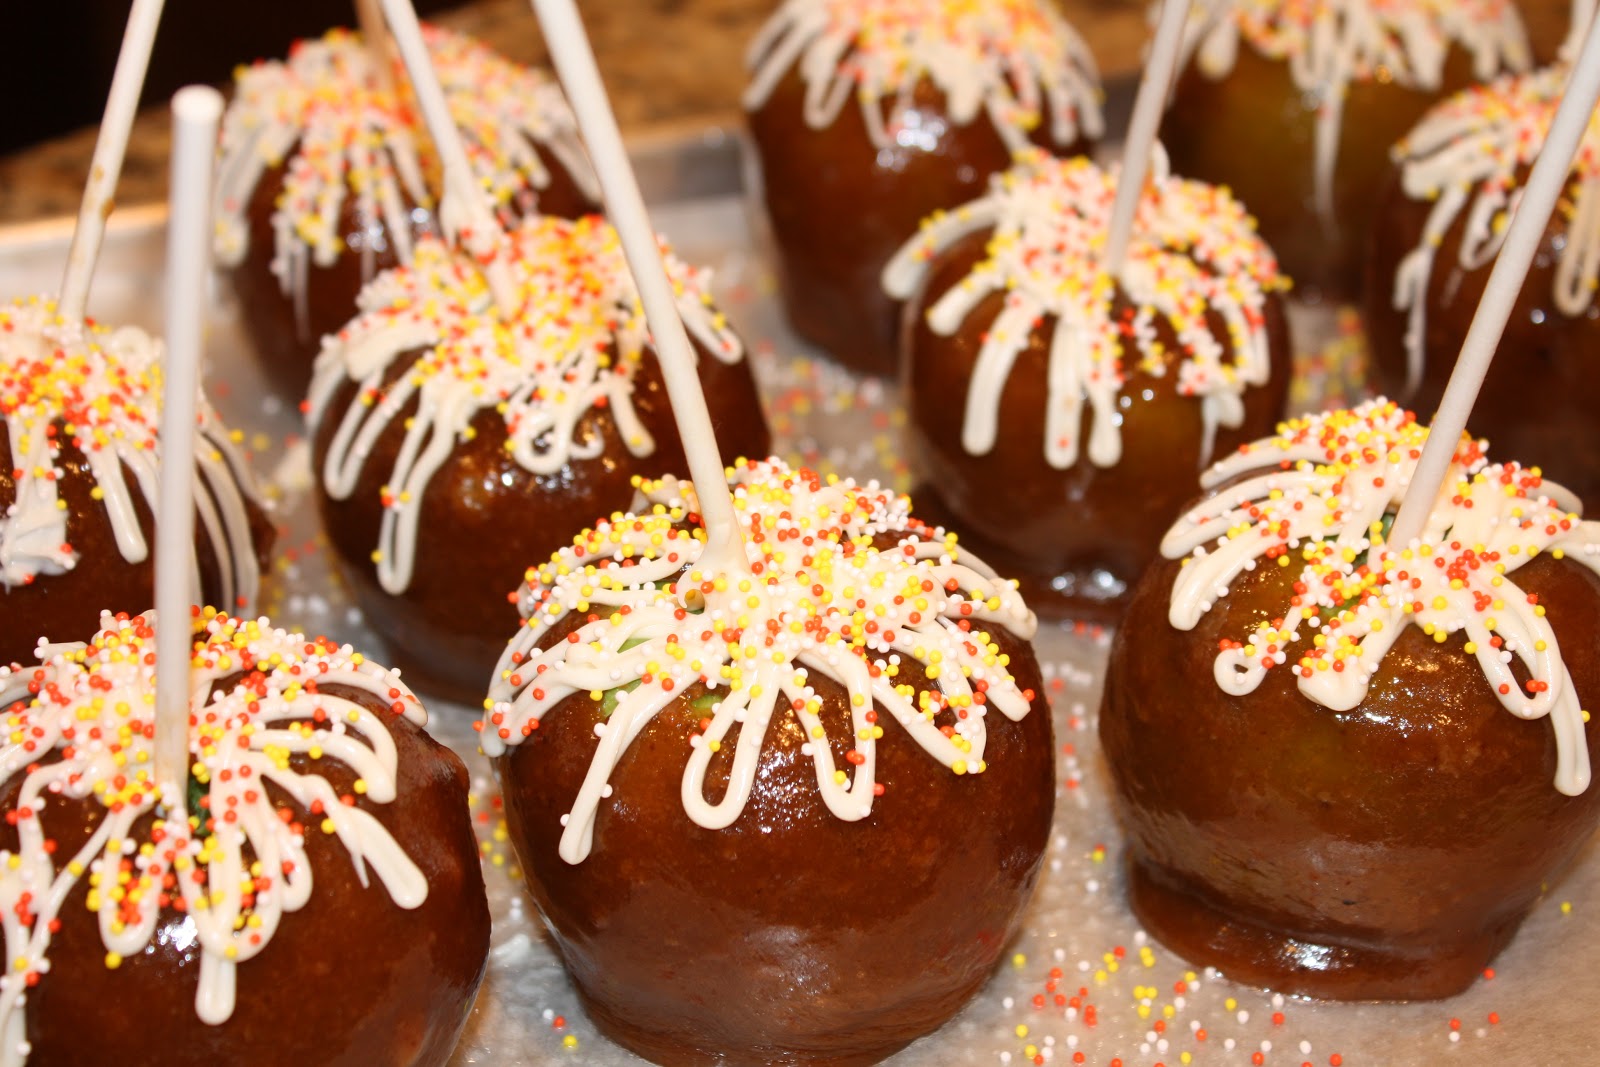
After the caramel apples have cooled and hardened, I love to jazz them up a bit (and cover any imperfections) with a little white chocolate and sprinkles. Who doesn't love sprinkles? I actually used almond bark, an imitation white chocolate, to drizzle on my apples. I broke off 2 cubes of the almond bark and melted it in my microwave, at 30 second intervals, for 1 1/2 minutes, stirring at each interval. I then snipped the corner of a ziploc bag, filled the bag with the melted almond bark, and began drizzling it all over the top of my apples.

Almond bark dries quickly, so you will want to drizzle it on only a few apples before you add your sprinkles, or they will not stick.
At this point, you are certainly at liberty to cut into one of those beautiful apples and sink your teeth into the rich, glorious goodness. You could also allow them to set for a couple of hours, then package them up to give away. I made these Friday night and packaged them on Saturday morning. I just used clear cellophane bags and jute string.

Who wouldn't want one of these little babies as a gift? Saturday morning, Jamie and I loaded up our kids and went on a walk, caramel apples in tow. It was a beautiful morning to be outside, and it was nice to be able to deliver homemade caramel apples to several families from our church who live within walking distance. I just love living in a small town.

Here are my kiddos, sporting their Halloween shirts, and ready to make the deliveries. We had fun counting all of the pumpkins we could see in front of the houses we walked past. I believe we counted 124 pumpkins.

I hope this post will inspire you to get in your kitchen and make some memories. Caramel apples are, in my opinion, the quintessential "Fall" food. Wrap them up, share them with your neighbors, and put smiles on the faces of your family and friends.
~ Jennifer
Subscribe to:
Comments (Atom)