Thursday, January 31, 2013

14 Days of Valentines: Valentine Love Sacks

I'm so glad you've decided to join us today for the kick-off to our 14 Days of Valentines!!!

I know today is January 31st, and technically there are 15 days until Valentine's Day. But, I thought we would get started a bit early. Plus, asking me to blog on Sunday is just not going to happen. I will be spending my time at Worship, preparing lunch for my family, a Super Bowl Party Sunday night after Worship, etc. Blogging does not fit in. So, here's to starting the 14 Days of Valentine's on January 31st! Enjoy!!!

I would like to begin with a disclaimer: If you're looking for the perfect craft or recipe to make you look like Martha Stewart in front of all your friends/family, then you're at the wrong place. You can just go ahead and click back over to Pinterest for those Martha Stewart-like crafts and eat your heart out, because that's not what we will be presenting you with for the next 2 weeks. No sir. However, if you're looking for a fun activity, a little Valentine inspiration, and a few tried and true recipes, then you've come to the right place. Let's get started!

On Monday night I gathered all the supplies needed to create Valentine Love Sacks with my children, and we had a great time. This project took about 10 minutes, tops. When you're working with small children, it's best to plan projects that are not too involved or time consuming. My kids love to craft, but they also love to play. A time-out from playing in order to craft is not always their first priority. So, choose your project and time slot wisely. Also, I've learned that it's best to gather all of your supplies and have everything ready BEFORE you even tell them you're plan. This helps to avoid the never ending question of "are you ready yet, Mom"? It also helps to avoid a loss of interest.
So, like I was saying, I gathered all of my supplies, then asked my kiddos to come to the kitchen table. I told them we would be making Valentine Love Sacks, so that we could add little notes, pictures, candies, etc. each day leading up to Valentine's Day. Like their Christmas stockings, we will open our sacks on Valentine's Day and have little surprises to make us smile.

Supplies:
white or brown paper lunch sacks
sticky-back Velcro (this is totally optional)
scissors
paper cutter
stickers
Conversation hearts (These were the biggest hit at my house!)
heart-shaped doilies
glue sticks and Elmer's glue
Valentine craft paper
ribbon
magic markers, colored pencils, crayons

I folded down the top of the lunch sacks, then unfolded and snipped away the inside layer to make just one flap. I then attached sticky-back Velcro, so that the sacks would stay closed. Who doesn't love Velcro? This step is totally optional, I just happened to have the Velcro on-hand and thought it would be fun.


My kiddos wrote their own names and they also made all of their own decorating choices. Do these sacks look like Martha Stewart? No way. That was not the point of the craft. I wanted my kids to have fun creating something all on their own. And they did. They each created their own sacks, then Parker created his Daddy's sack and I created my own. Like I said, this took about 10 minutes, then we let the sacks dry overnight. Tuesday morning, Parker was so eager to check on his Valentine Love Sack. Yes, all of the Conversation Hearts had firmly stuck to the sack. Victory!


 I displayed them in front of our fireplace on top of the beautiful red wooden sled my husband gave me for Christmas (I love it and cannot stand the thought of putting it away with the other christmas decorations yet. Don't judge.)


As soon as Parker came home from school Tuesday, he wanted to know if he had received any notes in his Valentine Love Sack yet? Umm.....no. Well, we had to remedy that quickly. We all began to create love notes and pictures. He was so cute, working in his room on a note, then coming to the kitchen to ask me how to spell certain words.  I also found some free printable love notes here.
I decided to leave a basket of love note supplies on the kitchen table so that the kids (or my husband!) could write little notes whenever they wanted.

After dinner last night, while I was getting ready for Bible study, I could hear my husband and kids talking about notes they were working on. I have to tell ya, I'm a bit tempted to open my Valentine Love Sack right now and just take a little peek. But, I will not. Yet.
It's going to be fun adding little notes to the sacks every day.
I hope you'll get your family together and create something fun! This craft cost me zero dollars, as I already had all the supplies, but I think it's going to pay big dividends when we open the sacks on Valentine's Day and enjoy reading our notes as a family. I can't wait!
~Jennifer


Tuesday, January 29, 2013

Making the Ordinary...Extraordinary

Good afternoon, Readers!
My daughter has been sick for the past 3 days with a terrible cold and low temperature, so we have been making the best of being at home. I need to grocery shop. Like bad. I know what you're thinking...couldn't I go to the store once my husband gets home from work? Sure. But, I'd much rather be at home with my family and I prefer to hit up Walmart in the morning hours before it gets crazy. Luckily, I keep a well-stocked pantry and freezer, so we've still been eating well. No worries.
Anyway, I really love to be at home. As much as I love shopping, traveling, being out with friends, etc., my favorite place of all is my home. Over 5 years ago when Jamie and I started getting serious about our budgeting and saving, we discovered that being at home was cheap! If you don't go anywhere, you don't spend any money. We began to create ways to make time at home even more enjoyable. Previously, we had gotten into the habit of going out for dinner every Friday night. While there is nothing wrong with that, we made the decision to break that habit in an effort to save on our food budget. It was hard at first. I didn't want to cook on Friday night. EVERYONE else was going out, blah, blah, blah. Well, I put on my big girl pants, and decided I would MAKE it fun to be at home on Friday night. I began planning special meals for Friday nights. Together, Jamie and I learned to make several delicious Asian dishes. We perfected our own egg-roll recipe, and now he is the master egg-roller-upper! Just ask him! ;) We enjoyed many nights playing Rummikub, he taught me how to really play Nerts, and we would often borrow movies from the library. Friday nights became our at-home date night.
Now, 5 years later, we are still enjoying our Friday nights at home. Occasionally we do go out to eat, but most Friday nights we can be found feasting on homemade pizza and playing Candy Land, Chutes and Ladders, or having Nerf-gun and light-saber wars with our 2 sweet-peas. Friday night pizza has become our family tradition, and I just LOVE it. Most Friday nights, Parker and Natalie help layer on the toppings. They love to spread the sauce, cover that with pepperoni and sausage, and then sprinkle as much mozzarella on top as I will allow them to. We eat like kings.
In addition to pizza, I often serve bottled cokes or root-beer to the fam. While we don't often drink cokes, Jamie and I do enjoy Coca-cola with our pizza and the kids love root-beer. They rarely get to have carbonated beverages, so an occasional root-beer is definitely extraordinary in their book.


Some Friday nights I will plan an extra special dessert to go along with our pizza. This past Friday we had chocolate molten lava cakes (which I will be sharing during our 14 Days of Valentines), and Parker thought he had died and gone to heaven. He was wowed by the molten middle. I must say I was wowed, too. And I've baked these cakes before. Molten chocolate packs a big punch. Seriously.

I hope this post will give you a little inspiration to make what could be another ordinary Friday night, waiting in a crowded restaurant with restless children and a hungry husband, and turn it into an extraordinary Friday night at home. This will not only help you save money, but more importantly it will help you build memories with your children. Get them in the kitchen with you and roll out some dough! Take pictures along the way. Play games with them, build blanket forts, watch "I Love Lucy", and read their favorite stories. You won't be sorry.

Below you will find the pizza dough recipe I've been using for a long time, given to me by my good friend, Joanna. It is SO easy, has no rise time, and has never failed me. Throw it together in a pinch, or freeze the dough and set out to thaw the morning you will be baking it. Enjoy!


Easiest Pizza Dough

1 Tablespoon active dry yeast
1 cup warm water (105-115 degrees)
1 teaspoon sugar
1 teaspoon salt
2 Tablespoons olive oil
2 1/2 cups flour

Preheat oven to 450 degrees. Dissolve the yeast in the warm water and set aside. In the bowl of your heavy-duty electric mixer, dump all the remaining ingredients. Add in the yeast/water mixture. With your mixer on low speed, combine all ingredients. Using the hook attachment (or by hand), knead the dough in your mixer for approximately 5 minutes. Roll out onto a lightly floured surface. Transfer to a baking sheet or pizza stone. I like to first sprinkle my pizza stone with cornmeal, then place the dough on top. Add toppings and bake at 450 degrees for 15-20 minutes until the crust looks crispy and lightly browned. Enjoy!
~ Jennifer


Wednesday, January 23, 2013

$$$$ and the New Year : Part 3

So, we've come to the end of our series on money. It hasn't been earth shattering, but hopefully it's served as a good reminder to make a budget and use your money in a disciplined manner whether it's cash, debit, or in rare cases credit cards.

I would like today's post to simply be about some great money saving and earning ideas I've come across and personally used.  If you have other things that have worked for you, then by all means share them with all our readers!

1.  Pay down your debt starting with the smallest amount first.  This way you will see payments disappear faster.  For example, if you have $2,000 on a credit card, and a $150 medical bill hanging over your head, pay the $150 first.  You will have COMPLETELY wiped that bill out, and can move the $150 over to help paying off the credit card.

2.  Find things to sell.  Whether it's maternity clothes you know you won't wear anymore, toys the kids have outgrown, that stationary bike collecting dust in the corner, sell it.  It's all worth money!  Use ebay, cragslist, your local consignment shop, or a good old fashioned garage sale.  Put the money you earn in a vacation fund, use it to pay off extra debt, or put it into savings.

3.  Eat in as much as you can.  I will admit, there are those days when I call my husband and have him pick up a pizza on the way home, but that's rare. Not only is it healthier to eat at home, it's WAY more economical.  You can cook dinner for about 1/3 of the price of eating out.

4.  Look in your local paper, or websites to find cheap or even free outings you can do with the kiddos or the hubs.  Many zoos and museums will have free days.

5.  Have clothing swaps with ladies from church or work.  My friend and I did a scarf swap.  We bagged up our scarves and swapped them for a couple months.  It gave us new accessories for FREE!!!

6.  Clip coupons.  I did that just this morning.  A coupon for 25 cents off something may seem immaterial, but clip 4 of those and you've just saved a dollar.  Savings is savings is savings.  This is important, only clip coupons for things you would buy anyways.  Don't clip a coupon for something you won't use, just because it's good deal.

7.  Swap out services with your friends.  Babysitting is a great example.  Watch your friends kids one week and ask her to do the same for you the next week.  Or, if you're a hairstylist, offer free cuts in return for handyman help, or sewing lessons.

Please feel free to list some other ways you can help your financial situation.  If there is some topic that you would like addressed regarding finances, please let us know and we can do that.

Stay tuned for the next couple weeks.  Jennifer and I are working on a special series called "14 DAYS OF VALENTINES"!!!!  So break out the red and pink construction paper and follow our blog for cute and original valentine activities, gifts, and recipes.

Monday, January 21, 2013

Sugar Saucers. YUM!

Happy Monday! Natalie and I baked some delicious cookies this morning, so I thought I'd share the recipe with ya'll. It came from "The Pastry Queen" cookbook, by Rebecca Rather. She owns "Rather Sweet Bakery" in Fredricksburg, TX, a charming little tourist town in the Texas Hill Country. I love Fredricksburg! Such a fun place to shop and it's full of neat little cafes and bakeries.
Okay, back to the cookies...the dough was so yummy! LOVED the dough. The cookies were also a treat and turned out to be delicious...I'm just hoping they last until tomorrow night when we host the college Bible study at our house. I better get my hand out of the cookie jar and get back on my treadmill.


Sugar Saucers
Yield: 1 dozen "saucer-size" cookies or 2 dozen 2-inch cookies

Ingredients
1/2 c. unsalted butter, at room temperature
1/2 c. canola oil
1/2 c. granulated sugar, plus for more sugaring the tops
1/2 c. powdered sugar
1 large egg
2 t. vanilla extract
2 c. all-purpose flour
1/2 t. baking soda
1/4 t. salt

Preheat the oven to 350 degrees. Line baking sheets with parchment paper. Using a mixer fitted with a paddle attachment, beat the butter in a large bowl on medium speed about 1 minute. One ingredient at a time, add the vegetable oil, granulated sugar, powdered sugar, egg, and vanilla, beating on medium speed after each addition until completely incorporated. Stir in the flour, baking soda, and salt all at once, with mixer on low speed. The dough will be soft. Refrigerate for 1 hour or freeze for 15 minutes (that's what we did!) to make dough easier to handle. Using a tablespoon size scoop for 2 inch cookies (larger scoop for bigger cookies), drop the dough onto the prepared baking sheets. The cookies should be spaced about 2 inches apart. Press the dough evenly with your fingers or palm to flatten cookies to 1/4 inch thickness (this was Natalie's favorite part!). Sprinkle sugar over tops of the cookies. Bake for 8-10 minutes for small cookies or 12 to 14 minutes for large ones, until the edges turn golden. Let the cookies cool on baking sheet at least 10 minutes before transferring to racks to cool completely.
Enjoy!
~ Jennifer


Thursday, January 17, 2013

Take control of your money!


Hey Everybody! 
Since Emily has been spending some time talking money with ya’ll, I thought I would give my two cents worth. No pun intended. ha.
Unless money grows on the trees in your backyard, and there are no trees in my backyard, then you need a budget. Rich, poor, beautiful, ugly....we all need a budget. It helps maintain sanity between husband and wife. There’s really no excuse not to have a budget. 
First plan of action: Invite your spouse for a “money” date. That’s right, a date where you talk money. This helps you and your spouse to both be mentally prepared for the topic of discussion. It’s been documented that most marital arguments have to do with money. Many times the topic completely blind-sides us. Have you been guilty of this? Using money as leverage? “You spent $$$$ on concert tickets, so I can spend $$$$ on clothes?” Fill in the blank. You know you’ve been guilty. So, instead of slapping each other in the face with money talk, set a date, and discuss the budget with clear heads.

Secondly, what are your financial goals? What are you trying to accomplish by having a budget? Is it time to pay off your student debt? Are credit card bills piling up after all the christmas shopping, traveling, partying? What about saving for retirement, or purchasing a new home? All of the above are reasons for budgeting. When you work out a budget and actually see where your money is going, it’s easier to see where you can “cut the fat” and save in certain areas. Also, when you determine a specific reason for saving, it’s very rewarding to watch as you pay off your debt or build towards that new car, home, vacation, etc.

Thirdly, yes, you CAN save money. After you’ve written out your budget for the first time, it may seem like there’s no “fat to cut” out. Did you think about all the Starbucks stops you make each week? That’s $5 right there that you could be saving. Each little bit adds up. In the book “Smart Women Finish Rich”, the author talks about the “latte factor”, which is what I just mentioned. If we cut out the $5 to Starbucks and the $1.50 Sonic drinks daily, the savings can really add up. Everyone can save and cut the fat somewhere, you just have to be honest with yourself and determined to make a difference in your budget.

Fourthly, if you don’t have the money...don’t spend it! The wallets of Americans are packed with credit cards. I admit that I have credit cards, but I’ve also learned how to use them wisely. Hard task. It’s so easy to see something you want, swipe your card, and it’s yours. Magic! But, after doing that a few times, it really adds up and can even become addicting. Dave Ramsey suggests cutting out credit cards entirely, which you may need to do. I had to do just that when my husband and I first got serious about budgeting. I needed to use cash, so that when it was gone, I was done. End of story. And folks, it worked. Was it easy? NOT. AT. ALL. Did I like it? NOPE. Was it painful? YES! But, I was determined, and had a clear goal in mind. I kept reminding myself of this quote from Dave Ramsey’s book “Live like no one else, so you can live like no one else.” I could do it. I would do it. It was 5 years ago that we decided to pay off our debt and save for the home we wanted to build. It was exciting to pay off our cars, pay off our credit card debt, pay for the land we wanted to build our home on, and then build up a down payment. We did it! We learned to budget and I learned to only spend the money we actually had. We became savers! We have now learned to use credit cards sensibly, and still with our budget in mind. We simply pay off the balance each month, because we budgeted to do so. By using our credit cards we are able to earn points towards travel, etc. But, we are not spending what we don’t have. VERY. IMPORTANT. CONCEPT. Mostly now, we use our debit card and keep all of our receipts. My husband creates a spreadsheet each month where we enter our budget, then record our spending as we go. This way we can see how much money we have left in each category, without having to withdraw cash at the beginning of each month. Because my husband makes the only income in our home, and he is completely commission based, we have a budget meeting each month to determine how much money will go into our allotted budget categories, and how much we will put towards savings, retirement, etc. 

I truly hope that this post will help someone out there who is reading! I certainly don’t feel like my way is the “only way” or even the “best way”. This is the way that worked for our family and because of that, I feel it could be beneficial to someone else. Maybe you can glean a couple of ideas from what I’ve listed here, or even just further motivation and determination to get your financial affairs in order. Sit down with your spouse and have a money date soon! Fix a chocolate pie to go along with it, everything’s more fun when chocolate is involved. 

~ Jennifer

Tuesday, January 8, 2013

$$$$ and the New Year : Part 2

Hopefully you were inspired to sit down and work out your budget.  If you've done it, GREAT!  If not, then please take the time to do so, it makes all the difference in being successful or unsuccessful financially.

This next post is probably the most difficult, yet the most rewarding.  Using cash.  I'm the first to admit that we are NOT perfect at this system, but each month that we use cash, we are definitely more in control of our finances.  There are no surprises when we look at our bank accounts, we thing twice before we buy something, and we count the cost.

Dave Ramsey advocates the "envelope system."  Again, I took his general idea and modified it for what works for us.  It makes me nervous to have 6-8 free floating envelopes in my diaper bag, so I found a coupon organizer that works very well for me.  Here's how you do it....
MY COUPON ORGANIZER TURNED CASH DISPENSER

1.  Look at your budget and put a star next to each category that you would be able to use cash for.  For us we do cash for groceries, entertainment, eating out, gifts, clothing, miscellaneous, blow $, car repairs, and home repairs.  We don't do cash for gas or our charitable giving.  I don't want to unload my 3 kids from our van and lug them into the gas station just so I can pay with cash, so using my debit card at the pump works the best, and we use checks for our charitable giving for tax purposes.

2.  Pull out cash for those categories.  You may choose to pull it out for the entire month, or pull it out for two weeks and at the end of two weeks, pull out the rest of the cash.

3.  Organize it.  Put your cash in the appropriate sections.

NOT A GREAT LOOK AT IT, BUT YOU GET THE IDEA.  LEXI LOOKS SUPER EXCITED ABOUT IT :)


4.  Spend it!  That's what it's there for!
THAT'S RIGHT!  I'M A BIG ROLLER!
I'm not going to get into the common sense of blowing through your cash and then using your debit card or credit card.  That is not going to help you financially. This system only works if you work it.  Discipline, discipline, discipline!

I know there are some great little accordion file folders that some of my friends have used for their cash.  You find these organizers at most office supply stores.  Let me know of any other cash ideas you have, and have worked for you.

Happy spending and saving!!!  Part 3 will be posted later this week, so stay tuned!

~Emily

Monday, January 7, 2013

Orange Vanilla Chip Cookies

Please allow me to interrupt the Budget conversation (Emily will be back with Post #2 shortly) for a very important announcement... today I'm linking up with my cousin Meredith's blog, to participate in MAKE COOKIES MONDAY! 


makecookiesmonday.jpg

I enjoy reading Meredith's blog on a regular basis, as she posts cute pictures of her three boys and often times a recipe or craft idea, too. When I saw her link up yesterday for "Make Cookies Monday" I knew I had to participate. I had actually already been planning to make cookies today, to have for my son's lunches the rest of the week. Oh, and for me to eat, too. :)
The chosen cookie recipe is from one of my all time favorite places....The Magnolia Bakery in New York City! I absolutely love visiting New York City, and often find myself daydreaming about walking the busy streets, watching a Broadway show, buying a hot dog from a street vendor, and stuffing my face with cupcakes from the Magnolia Bakery. The original is located in Greenwich Village, but there's also a convenient location across from Radio City Music Hall. If you ever visit NYC, you must indulge in a confection or two from this famous and fabulous bakery. The first time I visited the Magnolia Bakery was December of 2010, and I knew immediately that I must purchase their cookbook. I will not divulge the number of times my husband and I stopped in. It's a bit embarrassing. Oh, and we stopped in Crumb's, too. Another deliciously sinful bakery. Biggest cupcakes you will ever see. Or eat. In September of 2012 we were in NYC for only 9 hours and we stopped at both bakeries. We also ate pretzels, hotdogs, and the BEST. CHICKEN. PARMESAN. EVER. at Carmine's. Wow, I have seriously digressed. And gained weight.
Back to the cookies my daughter and I made today. They are from The Complete Magnolia Bakery Cookbook and are both my husband's and my son's favorite cookie. They really are delicious. ORANGE VANILLA CHIP COOKIES. They are much like eating a creamsicle cookie. You will love 'em. Here's the recipe:

2 1/4 c. all purpose flour
1/4 t. baking soda
1/2 t. salt
1 c. unsalted butter
1/2 c. sugar
1/2 c. brown sugar
1 large egg, at room temperature
1 T. grated orange zest (I always zest an entire large orange, which I'm sure is more than 1 T.)
1 c. vanilla chips
Preheat oven to 350 degrees. In a large bowl, sift together the flour, baking soda, and the salt. Set aside. In a large bowl, cream the butter with the sugars until smooth, about 3 minutes. 


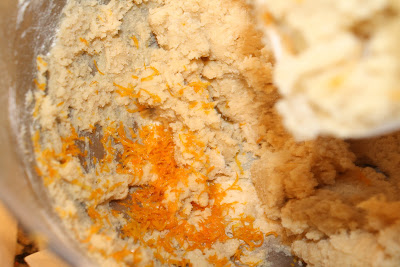
Add the egg and mix well. Add the flour mixture and beat thoroughly. Stir in the orange zest and the vanilla chips. (This is my most favorite part! The aroma of the orange zest will fill your kitchen in no time flat. Smells heavenly.)


Drop by rounded teaspoonfuls onto ungreased cookie sheets, leaving several inches between for expansion.


Bake for 10-12 minutes or until lightly golden brown. Cool the cookies on sheets for 1 minute, then remove to a rack to cool completely. 


Then, let your children eat 1 cookie. When they aren't looking, you allow yourself to eat 2. It's what all moms do, right?

If you don't want to bake all of your cookies at once (for fear you will eat them all yourself), you can follow all of the steps through putting the cookies on the baking sheet, but then instead of popping them into the oven to bake...pop them into the freezer! Once the rounded scoops are frozen, remove from the baking sheet and place them in a freezer bag. Label it, and you will be ready with homemade cookies whenever you having a craving for them. This comes in very handy when taking meals to others.


I hope you'll enjoy this recipe. You can also find several other cookie recipes by heading over to Meredith's blog. Happy Monday. 
~Jennifer

Thursday, January 3, 2013

$$$$ and the New Year: part 1

Let's talk about the dreaded BUDGET!!!!  Each new year I am determined, and say to my husband, "This will be the year we get out of debt and save money!" And every year, it seems like we end the year in same financial situation in which we began.  Well, no more!!!!  I'm determined and ready to take charge of our finances, and I'm sure some of you have the same determination and goal as me, so let's have a conversation about it!  For the record I do not use credit cards for spending sprees, but just like some of you, our cards are used for car repairs, or this year it was used for our new bundle of joy that came in June.  Maybe it's medical bills, family emergencies, or shopping, but debt is debt no matter how you look at it.

This will be a series of posts through this month.  Both Jennifer and I will be posting ideas about what works for us.

There are so many options when it comes to how you manage your money.  Some do cash, some use only their debit cards, some freakishly organized people use just credit cards and are disciplined enough to pay them off at the end of every month to rack up airline miles, or other rewards.  Whichever plan you use, if it works for you, then USE IT!!!  I'm not here to tell you my plan is superior to your way, but if you find yourself reflecting on the past year and realize that you could do better, or you want to try a different way to organize your finances, then keep reading....

First of all, I'm sure you've heard of Dave Ramsey and we use a modified version of his plan.  When I say modified, I just mean we do what works for us.  And just like Dave Ramsey we are going to take this in baby steps.  My baby steps are going to be very similar to his, although I'm not qualified, nor will I attempt to go into the investing and retirement side of that.  (Maybe we will have Jennifer's husband do a guest post since he is a financial advisor.)  Hehehehehehehe!!!!  Do you like how I rope unsuspecting people into our blog?


BABY STEP 1:  SIT DOWN WITH A PENCIL AND PAPER AND MAKE YOUR BUDGET.

I'm a weirdo.  I like doing our budget.  I like seeing where our money is going and I like feeling in control of where our money is going.  Look at it in a positive light.  Instead of feeling like your budget is a prison, not allowing you to buy and spend money as you please, look at your budget as a source of control that allows you to tell your money where to go.  For example, if you have $75 in your clothing budget for the month, and you decide you want to buy a new scarf, if there is money in the budget for it, then you don't have to feel guilty and wonder if you should have made that purchase.  Having a budget, for me anyway, has eliminated a lot of guilt in my purchases.  If the money is there, I know I can use it, if it's not, then I know there will be more next month.

I found some great budgeting worksheets that I printed for our budget, and a great place to start is Dave Ramsey starting place  because there he gives you ideas for how much you should spend in certain areas based on your take home income.

The main thing is, even if you have to use a good old fashioned pencil and blank sheet of paper, WRITE IT DOWN.  You may surprise yourself and realize you are doing great, or it may be a wakeup call.  Either way, the road to organizing and being in charge of your finances begins with having a budget.

In a few days, I will discuss Baby Step 2.  Stay tuned.......
~Emily

Tuesday, January 1, 2013

Happy New Year!

Happy New Year!
2012 was truly a year full of blessings for my family, as I hope it was for yours. The Lord has continued to shower us with His love and mercy, and I am so grateful. He has allowed me to see another year completed, and I praise His name daily for the provisions He has made for my family. It is my desire to live 2013 with more purpose, more strength, and more gratitude than I have in the past.

I always enjoy the idea of beginning again. Growing up, my dad was always encouraging my siblings and I to set goals, to make resolutions, and to write them down.  My dad is a list-maker, always keeping a clipboard handy to jot notes on. I am a list maker, too. There's just something so real and rewarding about crossing items off my "to-do" list. I just love it. So, in the past few days I've been busy making lists: grocery lists, projects to finish, goals for the year, etc.

First and foremost, I want to be a better Bible student. I have been a daily Bible reader for 15 years now, but I don't always read to learn. Know what I mean? So, this year I plan to do things differently. I am going to be using a study bible for part of my reading, and I bought a notebook to use to take notes in. I'm hoping that this will help my mind to focus more on what I'm reading.
I'm also setting the goal to become a "morning person". I've always loved the idea of getting up early, before my kids, and having a little bit of time to myself. However, I've yet to implement it. So, I'm going to set my alarm, and GET UP! Today I read a tip that really makes sense: If you plan to do something that you enjoy when you get up early, it will be much easier to get out of bed. So, that's my plan for tomorrow. I'll report back. ;)
I have several other plans I'm working on for better grocery shopping/cooking organization. Lately I've gotten in to the habit of going to the grocery store way too often. The more you shop, the more you spend. I need to spend less on my grocery bills. So, I'm going to plan better, and shop less. I will report back as soon as I have my plan all mapped out and let you know how it's working for me.
I've also made a "Projects" list. There are so many projects I want to do, several I've started and just haven't finished. I'm hoping that by getting up earlier in the mornings, I will be able to cross more items off of my project list.
So, what are your goals for the new year? Are you a list-maker? Please share any ideas you have, I would love to read them.
~Jennifer