Thursday, February 7, 2013

14 Days of Valentines: Day 8 - 10 minute table runner

I hope you were inspired by Jen's posts for the past 7 days.  I know I was!  For the next 7 days, you're with me!  I hope to show you some fun, creative ways to bring more love to your Valentines....

Today we are making 10 minute table runners.  No, I'm serious! They really take 10 minutes to make.  If I can do it in 10 minutes, YOU can do it too!  Here is what you will need....
1/2 yard of one cut of fabric and 1/3 yard of another cut of fabric.  Coordinating thread and either buttons, or ribbons in coordinating colors.


Sew the two fabric pieces, right sides together, to create a long tube.

Here is your tube.  Once you've done that, turn it right side out.

Here it is turned right side out.  Then center your tube, so that equal parts of the coordinating fabric is showing on either side, and then iron flat.

Fold your tube in half with the two fabrics showing on the outside.


Sew along the edge leaving about 1/4 to 1/2 seam allowance.

Then stick your hand in the corner of that seam and pull the corner out.  This will create a triangle end piece.

Here is is, once the corner has been pulled.


Sew buttons, or ribbons on where the corner meets the edge and.....

VOILA!!!  You've created a darling table runner for not much money at all!!!  I sewed buttons on one and ribbon on the other.

Here is is gracing my table and making it look oh-so-festive.


Hopefully, you could follow my instructions.  If not, click on the link here http://www.youtube.com/watch?v=Kfg8BMUakOc and it should help you better understand.


Think about the possibilities for all the holidays!!!  These also make impressive hostess gifts!!!  The total cost for one will be about $5.00!  I would love to see pictures if you make some.  Happy sewing!
~Emily

14 Days of Valentines: Elegant Decor

Day 7: Elegant Decor, Little Cost

Today I'm going to share with you a few Valentine's decorating ideas that you can use in your own home for very little cost.

Chalkboards

Chalkboards seem to be all the rage on Pinterest, design magazines, home decor catalogues, etc. A couple of years ago I discovered the beauty of chalkboard spray paint! It's amazing and I love it. The number one way I like to use chalkboard spray paint is by turning a picture frame into a chalkboard. I simply spray paint the glass, return it to the frame, and Voila! I have a chalkboard! I have done this with a picture frame by my kitchen sink, and I like to write different Bible verses, motivational thoughts, or holiday greetings on it. I also have a picture frame - turned chalkboard on display in our guest bedroom. Most recently, I was browsing the local Goodwill and ran across an unfinished wooden heart. It was $3.00. No way was I going to pass it up. So, I brought it home and turned it into a chalkboard, too! Lovin the spray paint, people! You can buy it at Hobby Lobby and Walmart. One can will last a very long time. Be sure to follow the directions on the back of the can and keep away from children. Also, I highly recommend purchasing chalkboard markers. They are worlds better than regular chalk. They are a bit pricey, so use a 40% off coupon at Hobby Lobby.


Heart-shaped Garland

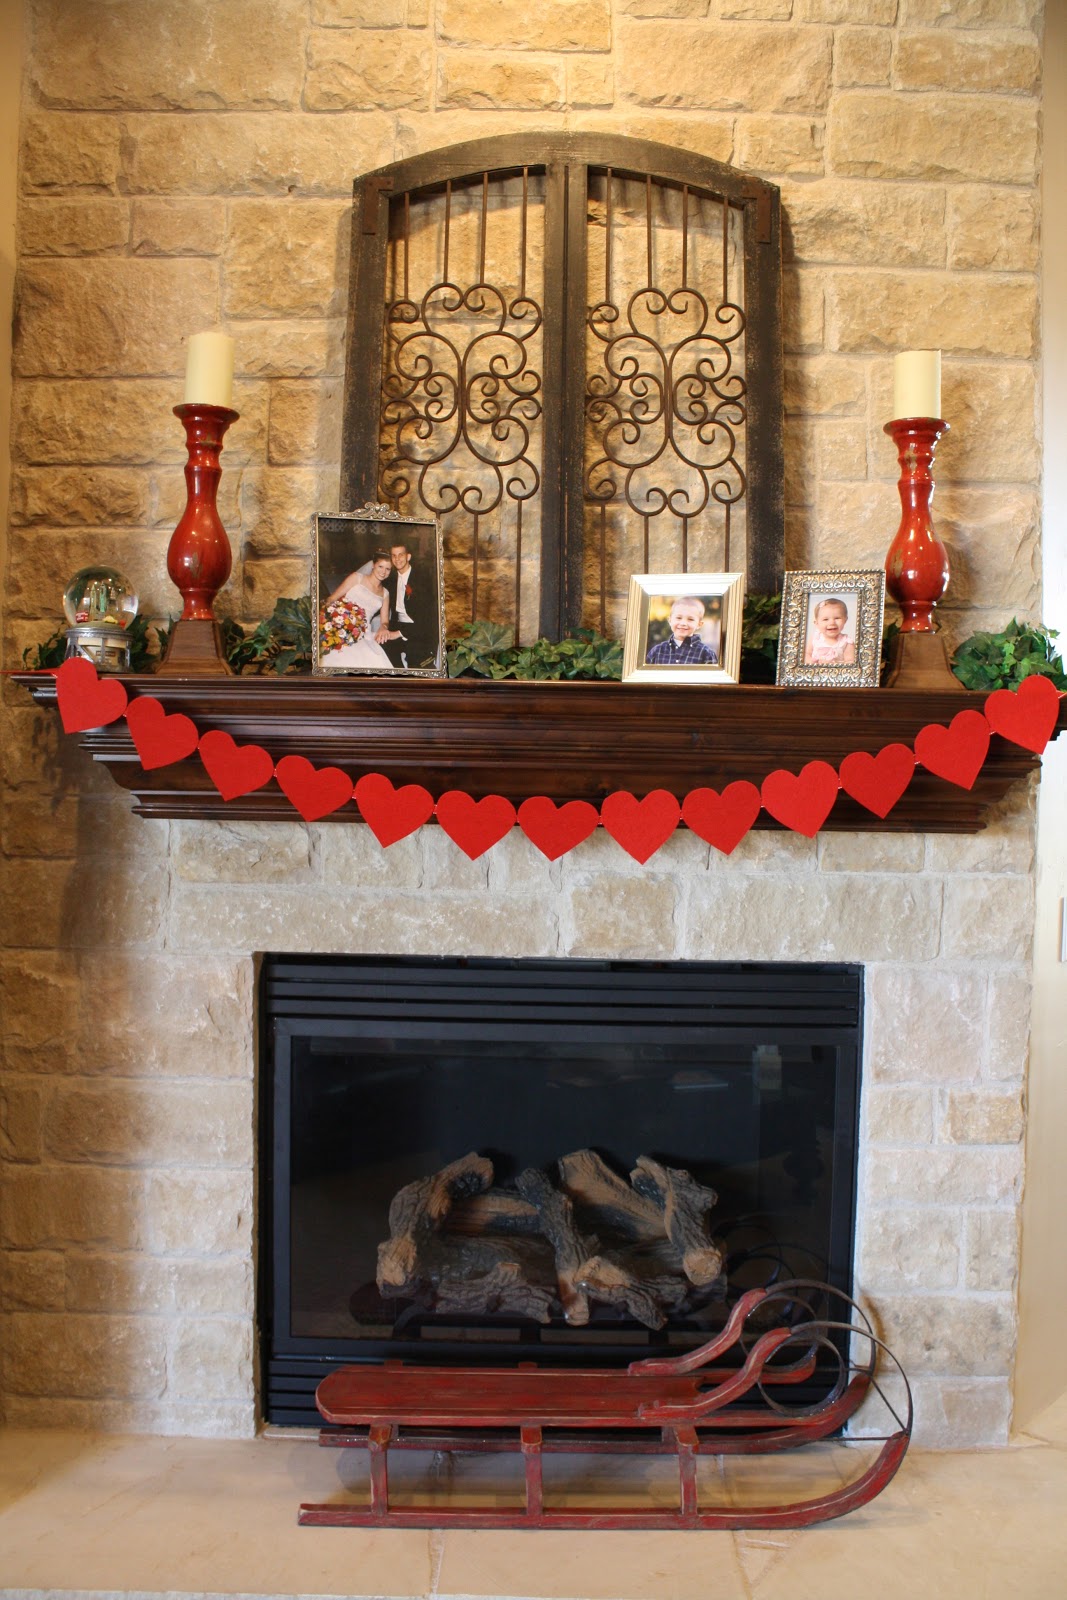
I had seen similar ideas on Pinterest, and thought how easy it would be to make my own heart garland to hang from my mantel. Here's how I did it:
I bought several sheets of stiff, red felt at Hobby Lobby. I  then found a large heart-shaped cookie cutter amongst my collection to use as a stencil. After stenciling the hearts with a sharpie marker, I cut them all out and headed to my sewing machine. I found some red ribbon that I already had on hand, and began sewing the hearts onto the ribbon, in a straight line. I'm sure you should probably pin all of the hearts onto the ribbon before you begin sewing, but I'm just being honest...I did not do that. I just started sewing. Once I had a  pretty long heart garland and thought it would be long enough for my mantel, I quit sewing. BUT, I did not cut the ribbon. I held the garland up at my mantel, determined that yes, it was long enough, so I then cut the ribbon. I have it hung on my mantel with a couple of pieces of tape. This craft cost me about $4.00 and 20 minutes of my time. Easy, inexpensive, and elegant!


Note: This picture was taken before we made our Valentine Love Sacks, so that's why you don't see them on my red sled. But, they are currently perched on the sled and getting fuller every day. My kiddos, husband, and I have all enjoyed writing valentines to each other.

Table Decor

On Saturday, I will be hosting a Valentine Luncheon here at my house for the ladies of our congregation. I have 9 other wonderful hostesses helping me out, and I'm so grateful. We are going to have a delicious lunch followed by a Valentine gift exchange. This afternoon, I went ahead and decorated my dining room table for the luncheon. When Jamie and I got married, the main color I used for decorating was red. Not much has changed in my life. I love red. I gravitate to all things red. It's a sickness, but I don't want a cure. Anyway, we had artificial rose petals on all of the reception tables along with floating red rose candles. After almost 10 years, I still have all that stuff. I have used it for multiple Valentine parties and I'm glad to be recycling it year after year.
So, I used the rose petals to make a runner down the middle of my dining table. I then added 6 little glass bowls (picked up recently for $1 each) to use for floating the rose candles. A few weeks ago, I got the idea to head over to one of the big antique stores in town and look for vintage valentines. Jackpot!!! I found a bunch of cute valentines to decorate with, for .50 - $1. I added those to the table, along with some scrabble tiles. I love how the table turned out. 


I have really enjoyed sharing some Valentine ideas with you over the past 7 days. I hope they have inspired you like they have me. Emily will be taking over from here by bringing the next 7 posts in our 14 Days of Valentines Series, and I can't wait to see what she has in store for us! 
~ Jennifer


Wednesday, February 6, 2013

14 Days of Valentines: Little Gifts and Simple Sweets

Day 6: Little Gifts and Simple Sweets
Clearly I'm losing it, as I just posted this as Day 5. Oops. Well, it's changed now. Sorry 'bout that. :)

Jamie and I started dating the first week of February, our freshman year in college. I knew that traditionally, couples gave each other some type of Valentine gift, but I wasn't sure what to get him. We had only been on a couple of dates, we weren't "official" yet, and buying a Valentine gift seemed appropriate, yet awkward. What to do, what to do? One of our dates had been to Starbucks, where he ordered a Caramel Macchiato and I ordered a hot chocolate. Don't judge. I was not a coffee-drinker back then. Little did I know, I would marry this coffee-drinking man who would freshly grind OUR coffee each morning and serve me cappuccino "just because". Aww, coffee....
I digress...
Ok, so I knew Jamie liked coffee. While browsing the aisles of the dreaded K-Mart in Temple Terrace, no doubt Emily was with me, I came across a 4-pack of bottled Starbucks' Frappuccino. Score! I also grabbed some Hershey's Hugs (not kisses, that would be too forward) and red tissue paper. Back in my dorm room, I stuffed the Hershey's Hugs into the space around the Frappuccinos, layered on some red tissue paper, and Voila! Valentine gift was complete. It was inexpensive, thoughtful, and Jamie loved it.
For old time's sake, I gave him the same Valentine gift last year, minus the candy and tissue paper.


 Now that I'm a momma, I like to make Valentine's special for my kiddos. Last year we made dessert pizzas together for Valentine's Day, and they were a big hit! When I first told Parker we were going to make dessert pizza, he was VERY skeptical. He even told me it sounded disgusting and he wasn't going to eat it. Obviously, he didn't "get" what dessert pizza was going to be.  Here's what we did: I made a simple sugar cookie recipe, like the one found here. I whipped together 1 block of cream cheese and 1 jar of marshmallow cream. Lastly, I sliced up some fresh strawberries.
I gave the kiddos a sugar cookie (pizza crust), let them cover the cookie with the cream cheese/marshmallow cream mixture (pizza sauce), and then top with strawberries! This was a fun activity and absolutely delicious!
~ Jennifer


Tuesday, February 5, 2013

14 Days of Valentines: Cherry Limeade

Day 5: Homemade Cherry Limeade

For as long as I can remember, cherry limeade has been my all-time favorite drink. Growing up in a small town, we were blessed with a local burger joint that not only made the best burgers and homestyle onion rings, but they made the very best cherry limeade on Earth! Sometimes during the summer months my mom would take my siblings and I and drive thru Mr. Burger to get lunch. I remember the very taste of the crispy onion rings, the tang of the mustard on my burger, and oh, how I remember the cherry limeades. Lucky for me, this burger joint is still in business, and every time I go home to visit my parents, my sweet husband drives thru The Burger (the name has changed, the food has not!) to get me a cherry limeade as soon as we roll in to town. There is no other drink quite like it. Cherry Limeades are nostalgic for me. I have tried cherry limeades at countless other places, all over the country, Sonic included, and none of them compare to the "real thing" found in my little home town. One time my sister made the 3 hour drive from my hometown to where we live now, and brought me a cherry limeade from The Burger. She had them make it without ice, so that it wouldn't be watered down. Oh, it was so good!!!
Since I can't make a 3 hour trip every afternoon for my favorite drink, I've learned to make cherry limeades at home. Of course, this recipe is not like they make at The Burger, but it's a pretty good substitution. I made this the first time for Natalie's 1st Birthday, which was a cupcakes and cherries theme, and every last drop was gone in a flash. I've served this at multiple parties and it always gets rave reviews. If you're looking for a special drink to serve to your Valentines, then this dreamy and pink refreshing drink is sure to hit the spot! Enjoy!
~Jennifer


Cherry Limeade

2 cans frozen limeade concentrate, thawed
3 liter Sprite
6 oz. maraschino cherry juice (or use Cherry Grenadine)

I make this in a 3 gallon drink dispenser. First, dump in the limeade concentrate. Begin by adding approximately 2 liters of Sprite and the cherry juice. Taste and add more Sprite as needed. Some people like their drinks more tart than others, so you will have to adjust according to your preference. You can always add more cherry juice as well. This recipe is just a jumping-off point, perfect the amounts to your own liking.
Serve over ice and top with a cherry! Perfect for a Valentine's Party or drinking on the porch on a hot Summer day.

Monday, February 4, 2013

14 Days of Valentines: Hosting a Children's Party

Day 4: Hosting a Children's Party

Two years ago, I hosted a children's Valentine party at our home. The age of children ranged from about 16 months up to 3 years old. All of the children brought decorated Valentine boxes and little valentines to share. The moms all pitched in and brought finger foods for lunch. I provided a few activities for the kids to do and they also spent a lot of time playing. It was nice, as moms, to be able to visit with other adults while the kids played. Parker still remembers this party and has been asking me to host one this year. He is going to get to have a Valentine party at school, so I'm skipping the kiddie party this year and hosting a Ladies' Valentine Luncheon on Saturday. I will be sure to share more about that later. For now, here is the info. on the children's party from two years ago. I hope this will inspire you to have some fun with your children. If you don't have small children, host a party with the kids from your Bible class, neighborhood kids, etc. My granmomma loves to have the little children from her Bible class over to make pizzas, decorate cookies, play games, etc. I know the children always appreciate her thoughtfulness and love for them.


Party Prep
I made a "Be Mine" banner with my Cricut di-cutting machine, tissue paper pom poms to hang from the ceiling, and I covered my dining table with brown craft paper. Parker and I decorated his Valentine box to look like a "love boat" and Natalie's was just a cute, girly box. I also bagged up animal crackers and little candies for the party favors.


Cookies
The day before the party, I made sugar cookies with my kids to serve to all of their little friends. Parker had a lot of fun dumping sprinkles on to the cookies! I've found that it's easier to put various toppings into muffin tins, then let the kids use tiny spoons to sprinkle with. When we made these 2 years ago, Natalie was more interested in trying to turn the cookie cutters into bracelets! ha! Now, she is my cookie making QUEEN!


These pictures bring back such precious memories. At this time, Parker was absolutely infatuated with King Arthur and all things knight. For Halloween he had been King Arthur, and by February he was still sporting his cape and crown, daily. Sweet boy.

Activities
I printed off some Valentine coloring sheets that I found free on the internet, and we also glued marshmallows onto construction paper, in the shape of a heart. Most of the kids loved doing this, however one boy just loved eating his marshmallows, glue and all! ha! The kids also enjoyed passing out their valentines and putting them in their friends' boxes.


I hope you will find some ideas here that you can use and turn into your own fun little party!
~ Jennifer

Saturday, February 2, 2013

14 Days of Valentines: Do What You Love

Day 3: Do Something You Love, with those you love.

It's late afternoon, and I'm just now sitting down to blog. We have had a wonderful day. We spent the morning preparing for company, and then had 7 high school/college age kids over for lunch and PIE making. Such fun!!! My stomach is so full I may explode any moment now. Fried apricot pies, pecan pie, and apple pie a la mode were all prepared, baked, and devoured in my kitchen this afternoon. What a blessing. I cannot think of a better way to spend my time than helping to develop cooking skills with young people, while providing a godly atmosphere, and fun, fun times! And food. I always provide food. It's what makes me happy; I love feeding people.
I hope you've found a little niche in this world that makes you happy, and that you spend your time with the ones you love. While Valentine's Day is a special day set aside to show love to those who are significant to us, may we truly display our love daily. It's fun to write Valentines to each other, to prepare and decorate cookies, to have your husband bring home flowers and chocolates for February 14th. But, if that's the only time we spend depositing "warm fuzzies" into the emotional bank accounts of our loved ones, then we are really missing the mark, and our emotional bank accounts will be very empty. We need to make positive deposits every day. Do something you love, with those you love on a daily basis and let them know how much they mean to you. Make a difference in the lives of others and create a legacy by which you will be remembered.
~ Jennifer
Have you tried the molten lava cakes or pizza dough? Let me know what you think.

Friday, February 1, 2013

14 Days of Valentines: Molten Lava Cakes

Day 2: Molten Lava Cakes

Good-morning! If you're looking for a fabulous dessert to "Wow" your boyfriend/girlfriend, husband/wife, children, friends, etc. for Valentine's Day, then look no further. Molten Lava Cakes are what dreams are made of. They are not only simple to prepare, but they have a short baking time, so you will be delighting your tastebuds with very little effort and very little wait. That could be a dangerous thing, people. I have no idea what the caloric intake is on these babies, nor do I want to know. All I need to know is that chocolate is involved, and I'm SOLD. Add in molten lava-like chocolate, and I'm OVER THE MOON. Everyone who has had a Molten Lava Cake at my house has requested the recipe. I promise, they are DREAM-LIKE! I made these a few years ago when Emily and her mom were here visiting me, and they loved 'em. They went home with the recipe, and I have heard back from Emily's mom that she has made them several times. I know you will enjoy them, too.


Molten Lava Cakes

1/2 cup semi-sweet chocolate chips
1/2 cup butter
1 cup powdered sugar
2 whole eggs
2 egg yolks
6 Tablespoons all-purpose flour

Preheat oven to 425 degrees. For baking, I use greased ramekins (custard cups) that are 3 1/2 inches wide by 2 inches deep, and the recipe fills 5 of those. (I bought my ramekins several years ago at Pier 1 for $2). So, grease your ramekins and set on a cookie sheet. In a medium bowl, microwave chocolate and butter on high for about 1 minute, until butter is melted. Once the butter is melted, remove from microwave and whisk until the chocolate is also melted. Stir in powdered sugar until well blended. Whisk in eggs and egg yolks. Stir in flour.
Divide between cups.
Bake 15 minutes (baking time will vary depending on your oven) until sides are firm and center is soft. Very important: LET STAND 1 MINUTE. Invert onto a plate, top with vanilla ice-cream or fresh whipped cream and serve immediately. Enjoy!
~ Jennifer
And, may all your dreams be of chocolate.